STEARsoft: Fuller example of ODBC import
You don't have to use ODBC at all for importing data (each teacher can use the generic wizard to import class and student data manually), but if you do use ODBC, this is a fuller example of much of the data you can import automatically. Although fuller, the data is more complete, so in someways may be easier to follow than the 'basic/minimum' example.
Your data needs to be in some kind of standard data-base format (or a system that supports ODBC at least). Here is an example in Microsoft Access. As you can see, the database is called "school-full" (top left of screen) and contains 8 tables. For importing, you must have a table of teachers, a table of classes and a table of students. To link students to classes we have a class-student link table, and to link teachers to classes we have a timetable table. Sitting around this are tables giving additional details; day and period information to timetabled lessons and house names to students. These are refered to by unique ID numbers. Towards the bottom of the screen you can see a Relationships window which show how these tables relate to each other..
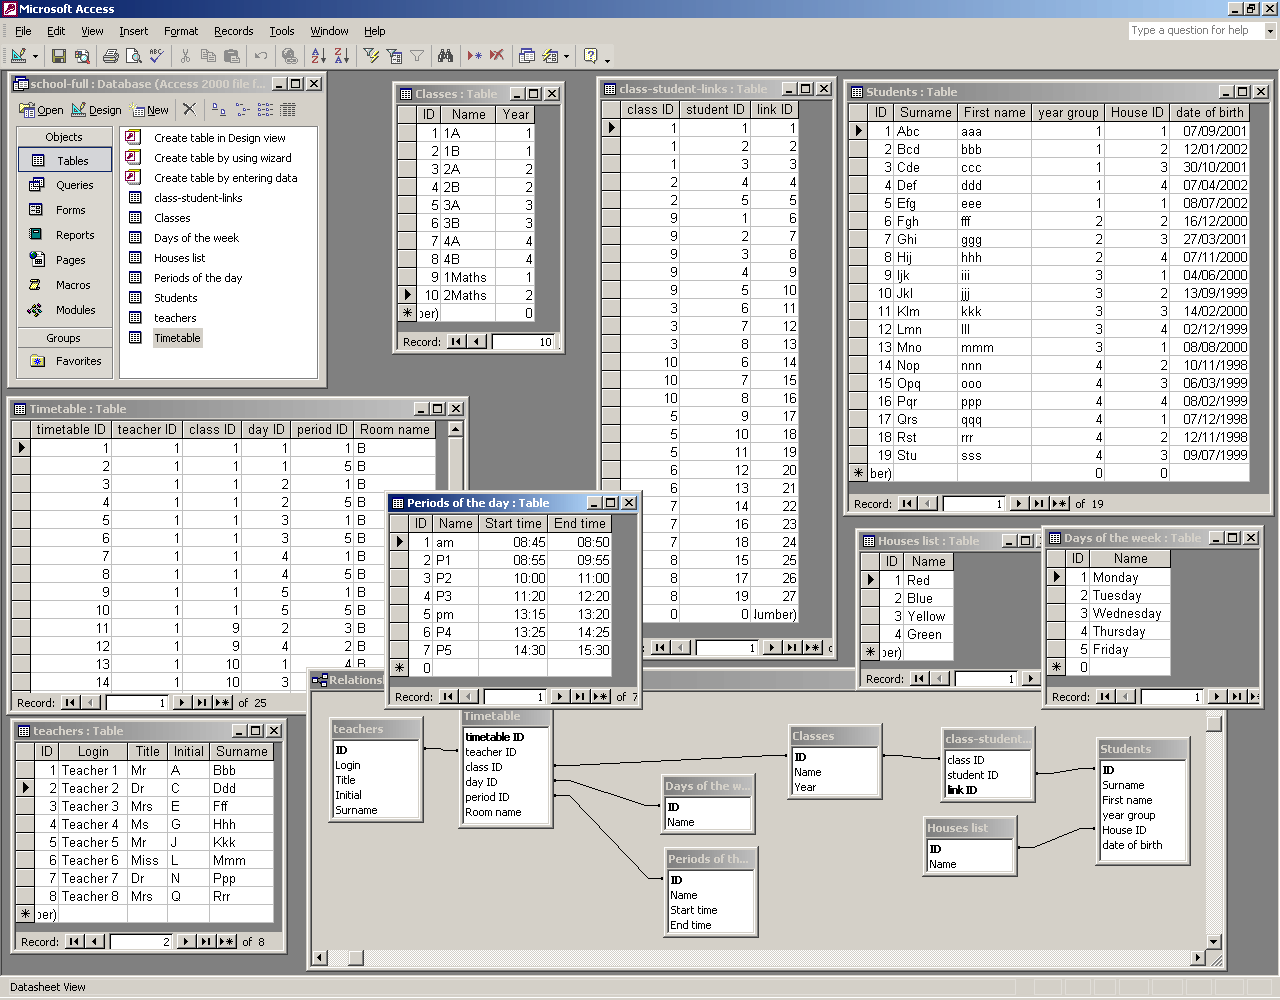
Before continuing it is worth spending a moment to understand how the above database works: Look at the timetable. Row 1 represents a lesson taught by teacher ID 1 (Mr A Bbb) to class ID 1 (1A) on day ID 1 (Monday) during period ID 1 (am) in room B. Following down, you can see that all of the first 10 lessons defined here are for Mr A Bbb teaching class 1A during am and pm of each day of the week - perhaps morning and afternoon registration. Looking at the detail of class 1A only tells you it is in year 1. However, looking in the class-student-links table, the first 3 rows refer to class 1A by its ID(1). These rows link this class to student IDs 1,2 and 3. Looking in the students table, we can see these students are aaa, bbb and ccc. We can look up their House in the House table to find that aaa is in house 'Red'(ID1), bbb is in house 'Blue'(ID2) and ccc is in house 'Yellow'(ID3).
Once you have a database, you need to make it available to the system as an ODBC data source. Here's how:
1) Open Control Panel
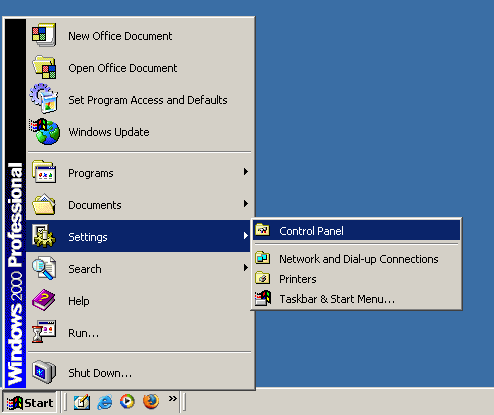
2) Open 'Administrative tools'
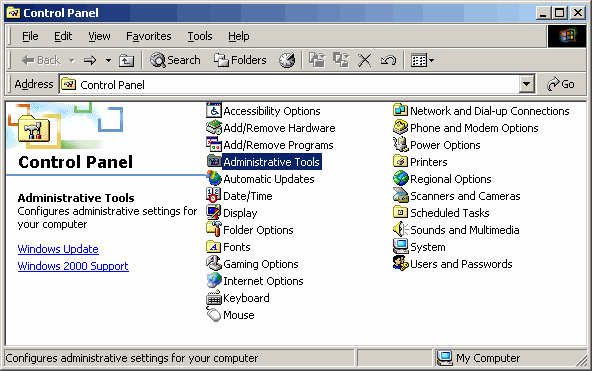
3) Open 'Data Sources (ODBC)'
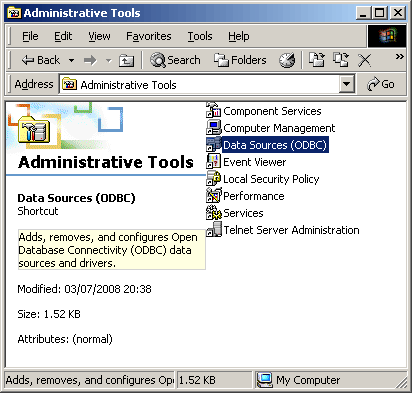
Which brings up a screen like this...
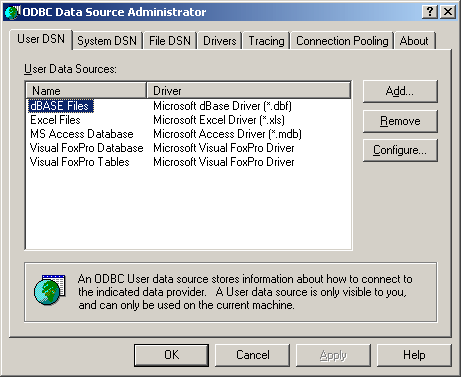
4) Change to the 'System DSN' tab (this is important, as STEARsoft only has access to the System area).
5) Then press the 'Add...' button to add your database.
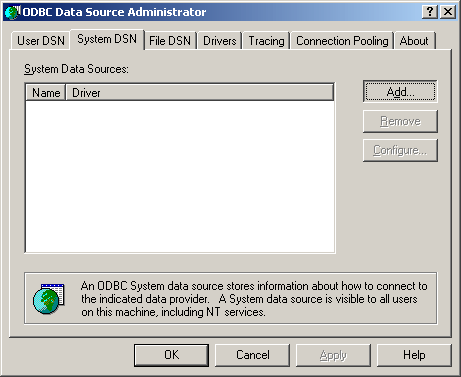
6) You need to select the system your database is in (if your system is not listed, it is sometimes possible to install what is called an 'ODBC driver' which you will need to obtain from the provider of the database system you are using).
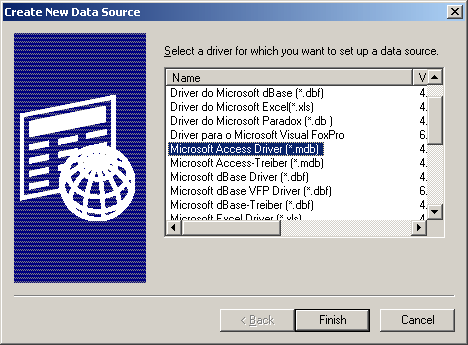
7) Click 'Finish' to get to the next screen.
8) This screen may vary from system to system. For Access, press the 'Select...' button to locate your particular database file.
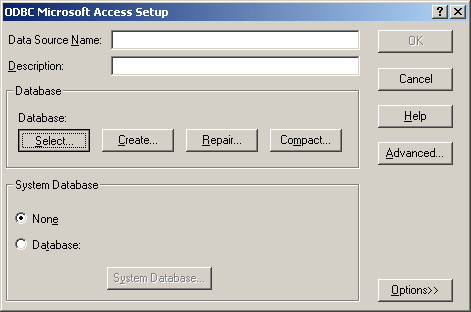
9) When you've located it, press 'OK'
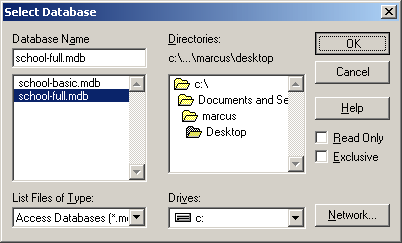
It now appears identified.
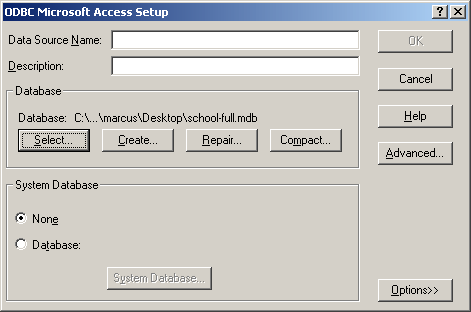
10) Fill in a name to identify your data source and an optional Description. At this point you can optionally set Advanced settings to do with username and password protection for accessing this data.
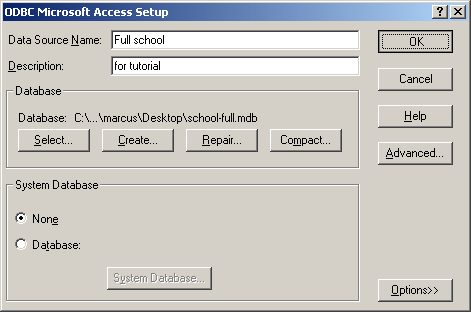
11) Press the 'OK' button to confirm and return to the Data Sources screen where you should now see your database listed.
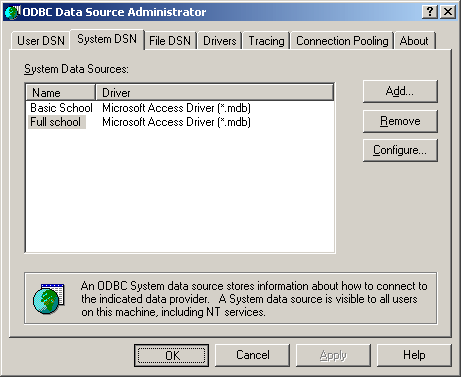
12) Click 'OK' here as well to complete the process.
You now have an ODBC data source which STEARsoft will be able to access, so start STEARsoft:
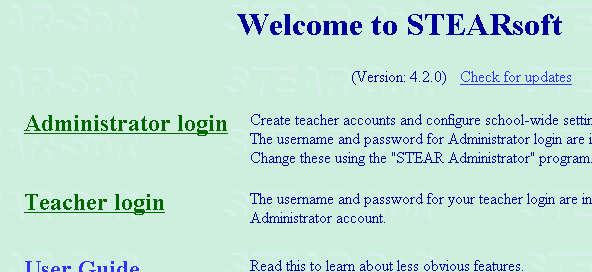
You only need to link up your ODBC data source once. Once set up, any changes to data in your main database can be imported on a single click. Here's how to set up the link:
1) Go to the 'Administrator login'
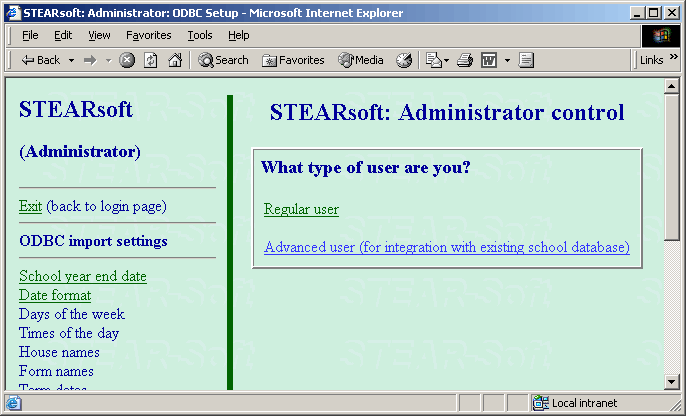
2a) If you are running this for the first time, near the beginning of the setup Wizard you have the following option. In this case, select the 'Advanced user' option.
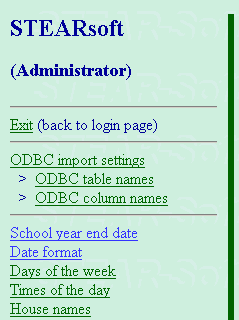
2b) If you have already run the setup wizard, you can get to these options by clicking on 'ODBC import settings' on the left panel.
3) Either way you get a screen with the following options below some instructions. Select your database in the dropdown list. You only need to type the STEARsoft administrator username and password if you need to add or change a Database password.
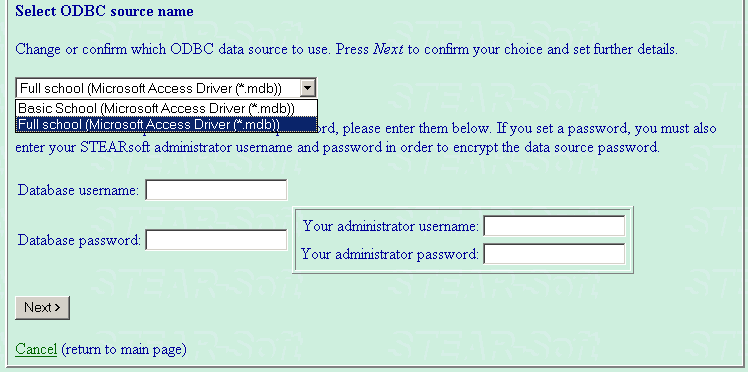
4) Click the 'Next>' button to get to the next screen. On this screen, you can simplify the lists you get by un-ticking the SYSTEM TABLE type and click 'Update lists'.
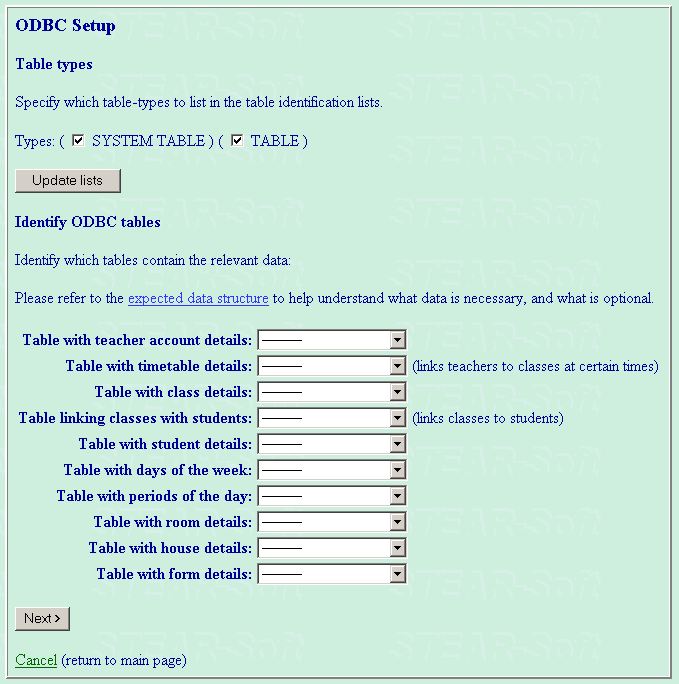
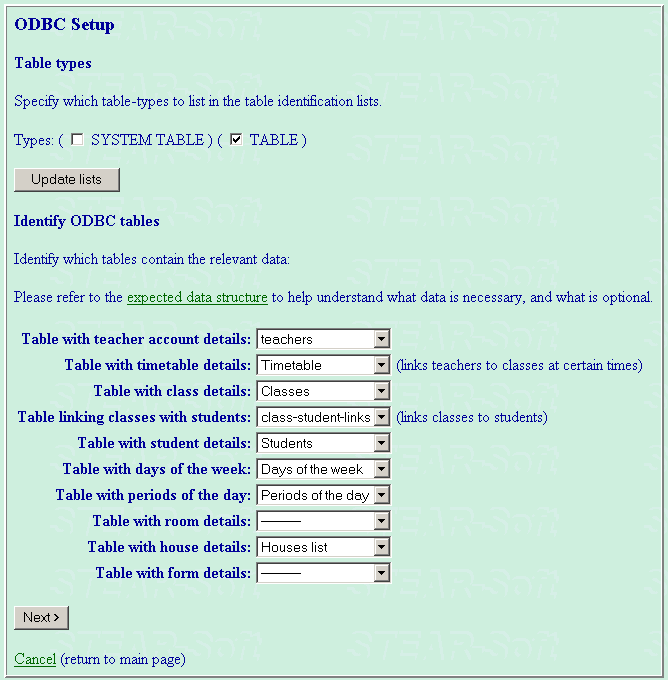
5) Select the tables from your database to fit the descriptions. Unlike the minimal example, because our database is structured more fully with proper IDs, the matching here is fairly straight-forward.
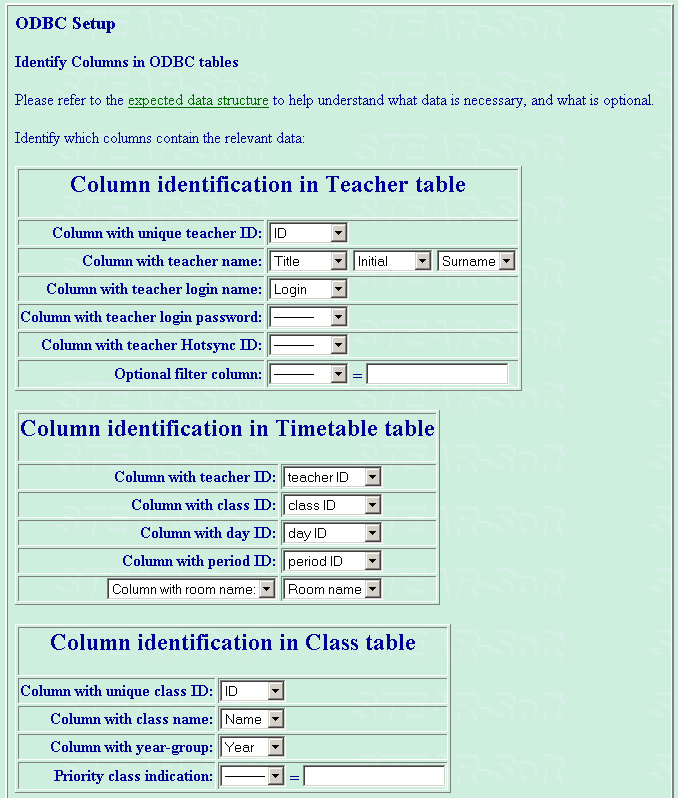
Clicking 'Next>' takes us to the final screen where we specify the details within each table. The 'expected data structure' link at the top gives a useful diagram showing how all the tables should link together and what information is required, and what is optional. The teacher table must at a minimum associate a 'login name' to a teacher ID, but the more we can fill in, the better. Notice in the Timetable definition we change the room column description box to 'room name' as opposed to ID, as our table just gives a name.
Points of note in the next 4 tables start with the student table. The ID is also used to give a school role number. This is OK because the ID is unique for each student and it is a number. Specifying a role number (even if it isn't technically a role number) allows matching of students withing STEARsoft when enables some of the more advanced features.
The second point of note is in the Days of the week. Because the ID is numeric and sequential for the days, it can also be used for the day offset.
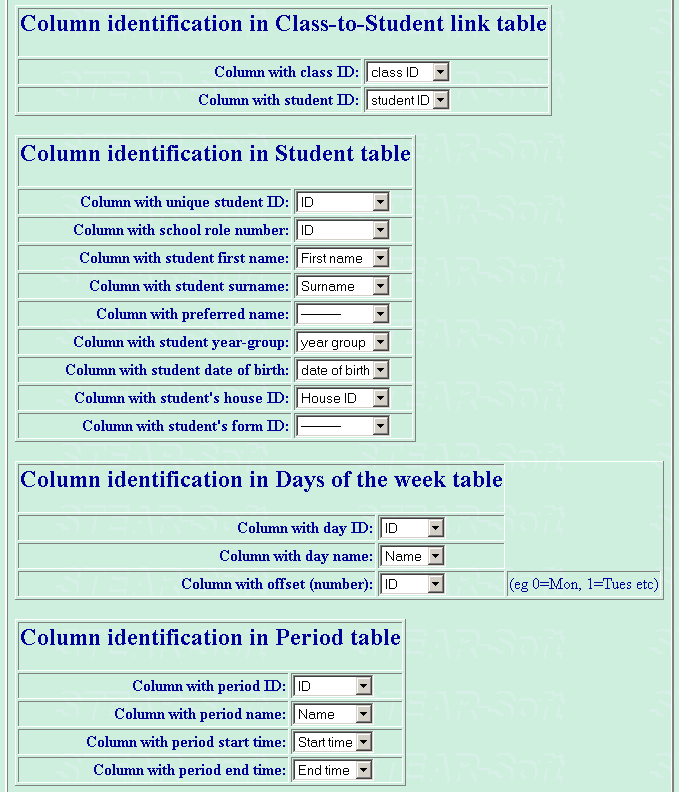
The last table definitions (House list) are straight-forward again. When you've completed this screen, press the Finish button and apart from the exceptions regarding days, times and houses described below, complete the rest of the setup wizard as described in other tutorials.

Having set up a link to your database, some of the administrator settings can be made automatically by importing from your database. In fact, you MUST do an 'ODBC' import from your database so that STEARsoft knows about the special ID values so it knows how to link things together when it imports teacher specific data.
So when you get to importing days of the week, if you are going through the wizard for the first time, it will automatically detect and suggest using the import data. If you have already been through the wizard, then you should now click on 'Days of the week' under the left options panel to bring up a screen like the one below:
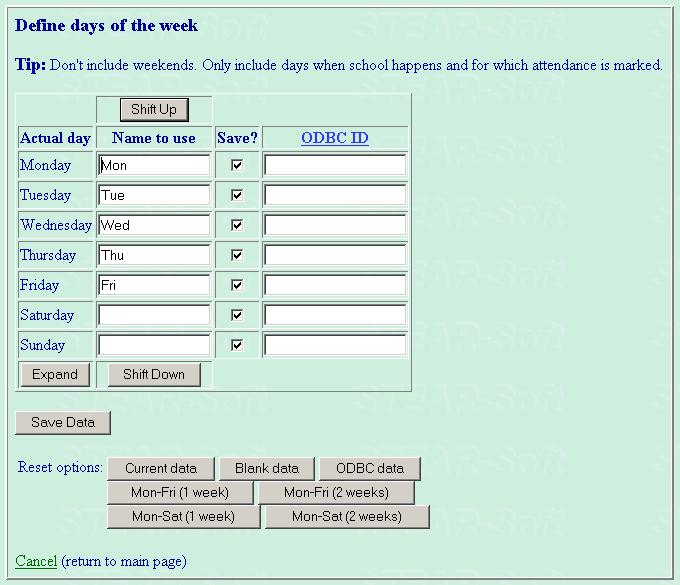
To use your database data, click on the 'ODBC data' button in the Reset options at the bottom. This picks up the names from our database and more importantly fills in the 'ODBC ID' column:
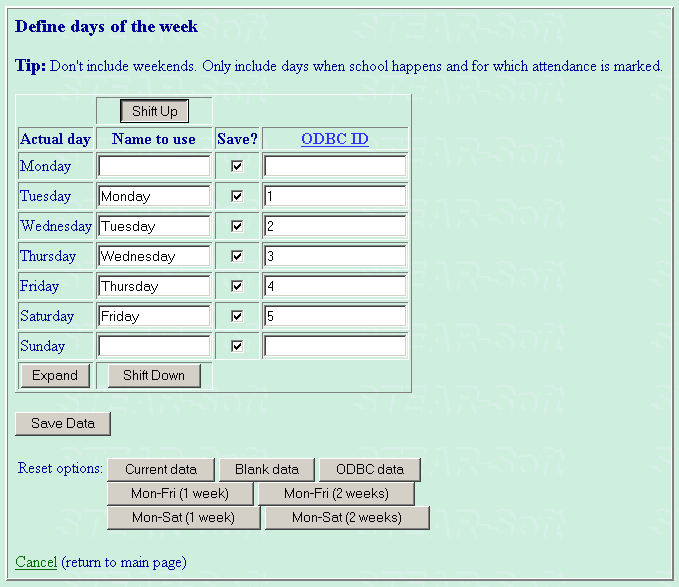
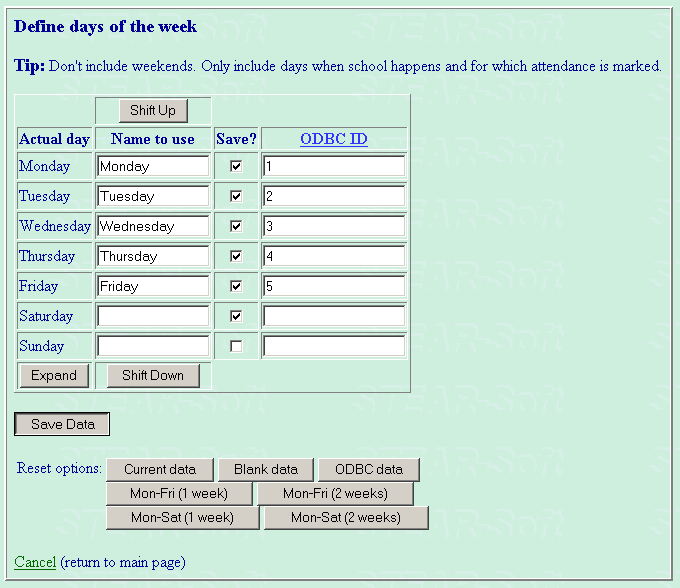
As shown here, the offset information we gave didn't fit with STEARsoft's understanding. To adjust this click on the 'Shift Up' (or 'Shift Down') button to shuffle everything so Monday matches with Monday. Having pressed Shift Up once we get the following screen, where we can press 'Save Data' to confirm and move on.
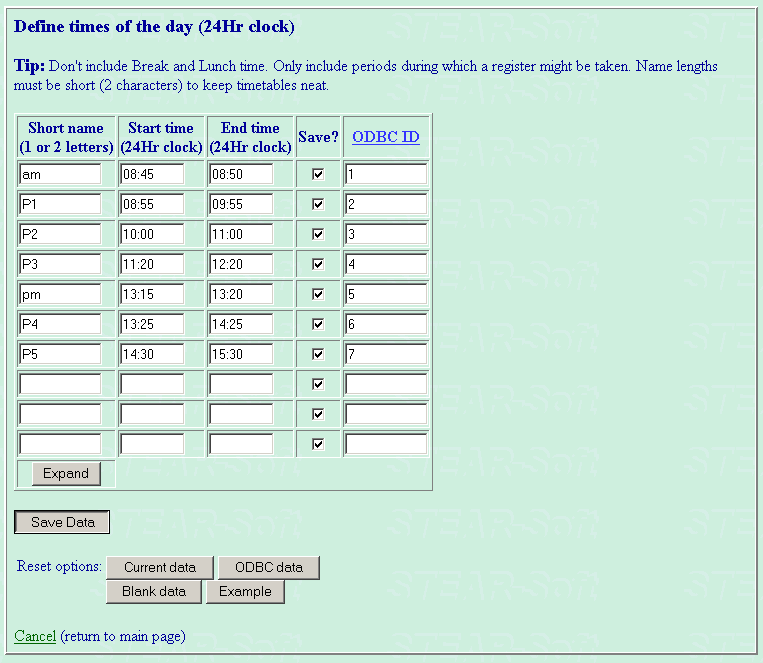
We also need to use ODBC data for 'times of the day' (periods), so either during the setup you will come to this screen, or you should click on 'Times of the day' on the left options panel to get here:
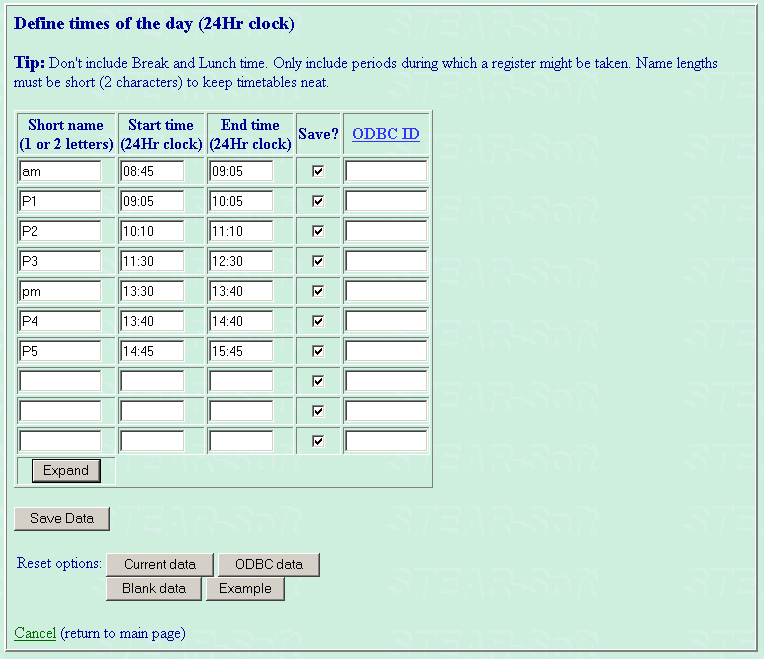
Again, click on the 'ODBC data' button in the Reset options to obtain the data from your database, complete with 'ODBC ID'. You can then press the 'Save Data' button to continue:
House names should also be made to import the ODBC data from our database. Again, either you will get here during the wizard, or if you are updating an existing installation, click on the 'House names' link on the left options panel. As before, if you are running the wizard for the first time it will automatically detect and suggest our ODBC-imported data, otherwise, press the 'ODBC data' button to import it to ensure the 'ODBC ID' column is complete. Then press 'Save Data' again to move on:
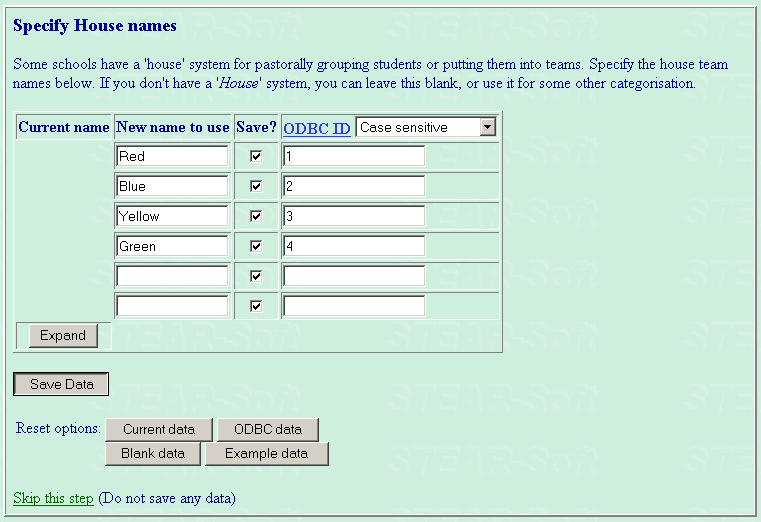
If your database doesn't have a house list, but simply refers to a name or letter within each student record, you can manually create this list here instead and in the 'ODBC ID' column type the code for each house name.
If you use 'forms' instead, or as well as 'houses', they work in exactly the same way.
Towards the end of the prompted wizard setup screens, you will get to the following screen where you should click on 'ODBC: Import teacher accounts'

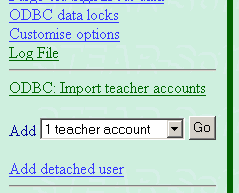
If you miss this, or have already created some teacher accounts manually, you can access this on the left panel, as shown below. Also click on 'ODBC: Import teacher accounts'. (you can do this at any point in the future to import new teacher accounts, or change existing details when they're available in your database.
Either way, you will get to the following screen which lists all the teachers in your database available for importing: (any teachers that you have already imported that haven't had their details changed will not be listed).
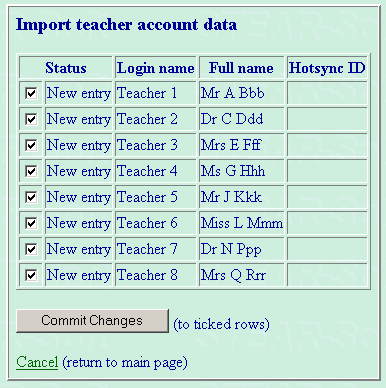
Make sure the teachers you want to import are ticked and press the 'Commit Changes' button.
That completes the administrator part, so back at the main screen, click the 'Exit' link:
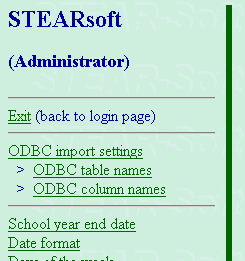
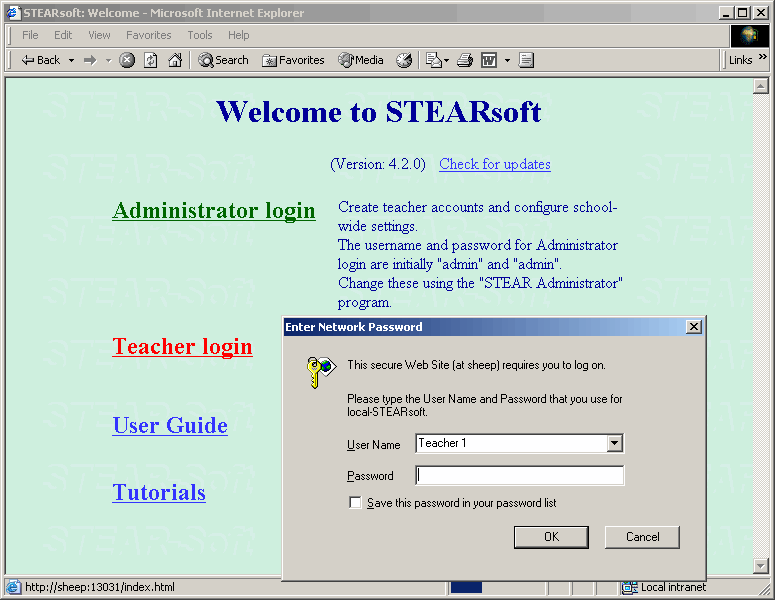
Then teachers can log in with their login name as imported from your database:
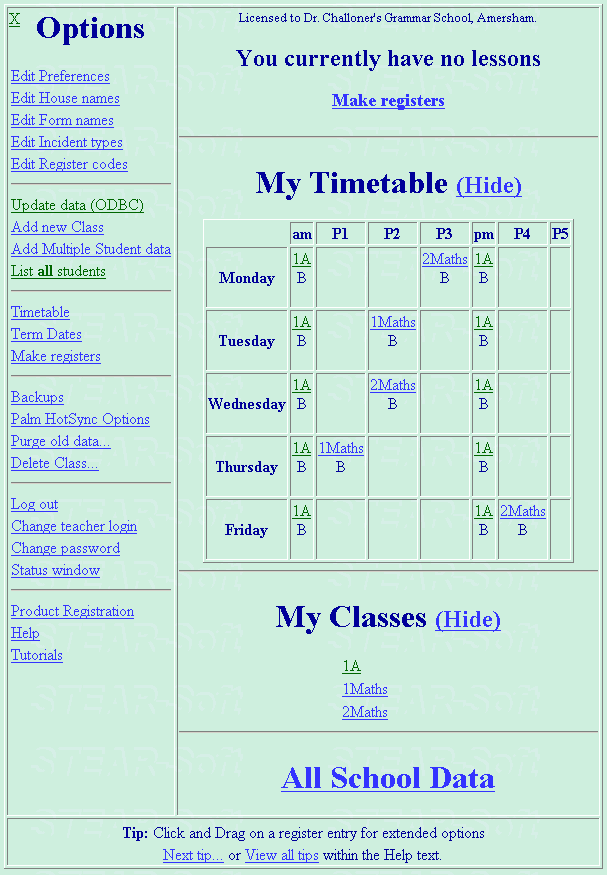
When they get to their screen, their classes from your database will automatically be imported (listed under 'My Classes'). Their timetable will also have been imported. Changes to your database here-after won't AUTOMATICALLY import here. teachers need to click the 'Update data (ODBC)' link in the options panel on the left to scan and import any changes or new data from your database.
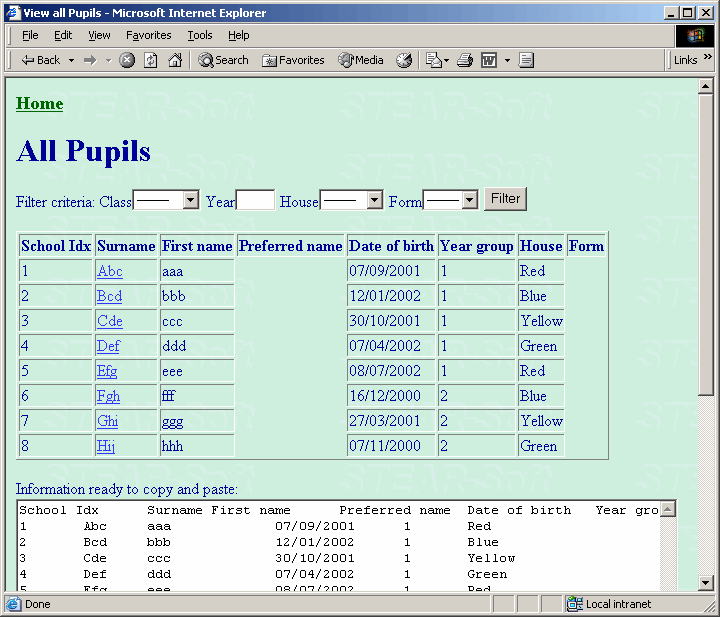
The import process also imports all their students, allocating them to classes. Clicking on 'List all students' shows this screen:
Going back to the home page, and then clicking on for example class '1A' in their timetable brings up the attendance sheet, with the students already correctly matched to that class:
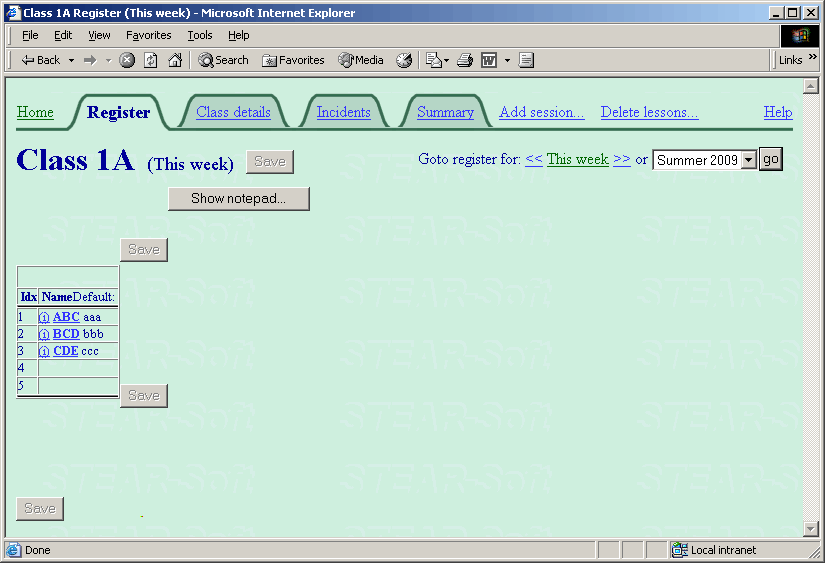
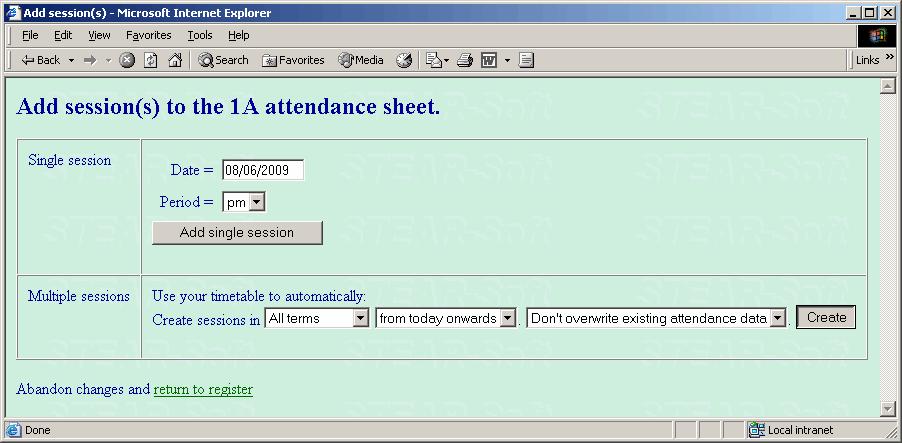
Initially there are no entries in the sheet. The teacher should click 'Add session...' just to the right of the tabs at the top of the page. This brings up the following screen. The default options are usually fine, so in the 'Multiple sessions' bit, press the 'Create' button:
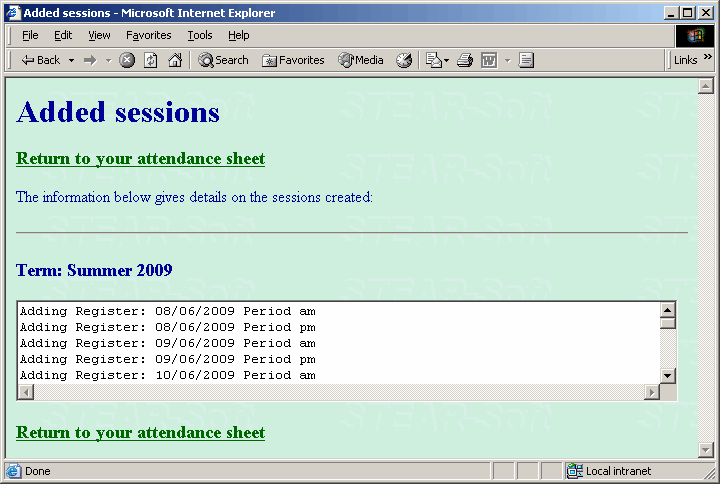
A screen comes up confirming the register entries added. There is nothing to do here except be reassured and click 'Return to your attendance sheet':
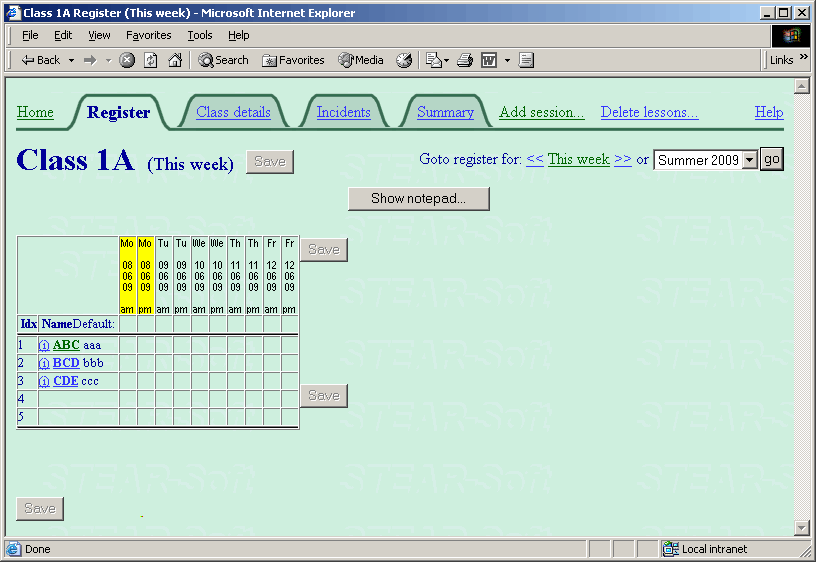
Back at the attendance sheet, all dates are now ready having been generated using term date and timetable information:
That concludes this fuller example of using an ODBC interface to dynamically import data from a database. In many ways this fuller example is less complex than the minimal (basic) example because it doesn't need to do so much clever double using of table entries.
Back to the tutorials page


