STEARsoft: Basic example of ODBC import
You don't have to use ODBC at all for importing data (each teacher can use the generic wizard to import class and student data manually), but if you do use ODBC, this is a 'minimum' example. (Not necessarily the most simple, as coping with less information requires giving some information double, or triple meanings!). Unless you are particularly interested in seeing how you can be clever to get away with importing from a minimal database, you may prefer to look at the fuller ODBC import example.
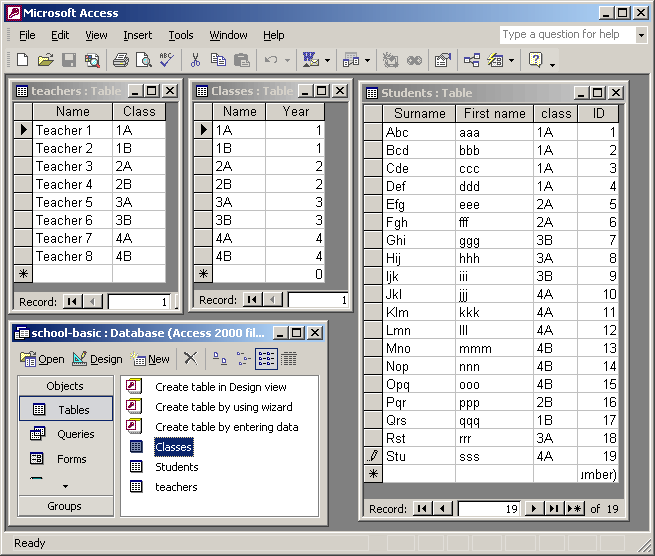
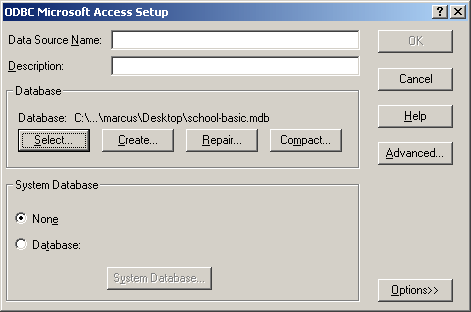
Your data needs to be in some kind of standard data-base format (or a system that supports ODBC at least). Here is an example in Microsoft Access. As you can see, the database is called "school-basic" (bottom left screen) and contains 3 tables. For importing, you must have a table of teachers, a table of classes and a table of students. Normally you'd also need a linking table to match teachers to multiple classes and also one to match students to multiple classes. This example gets away without that as each teacher only has one class, and each student is only in one class too. Classes might normally have an ID, but their name is considered unique so becomes the ID. In this simple example, Teachers are also identified by the class they teach.
Once you have a database, you need to make it available to the system as an ODBC data source. Here's how:
1) Open Control Panel
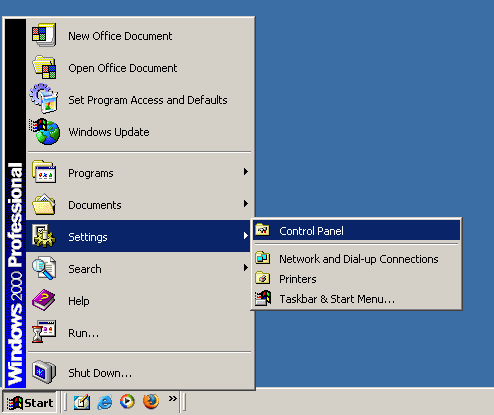
2) Open 'Administrative tools'
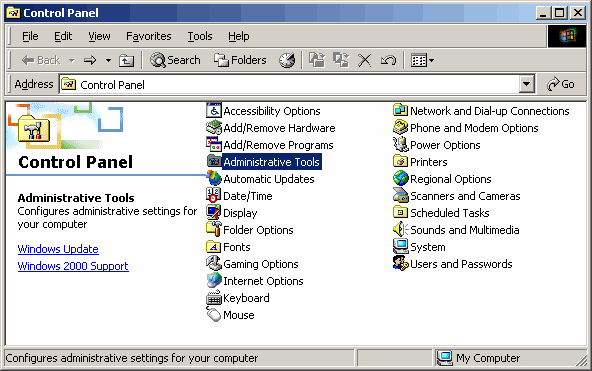
3) Open 'Data Sources (ODBC)'
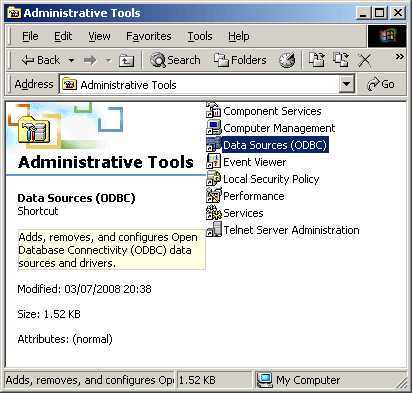
Which brings up a screen like this...
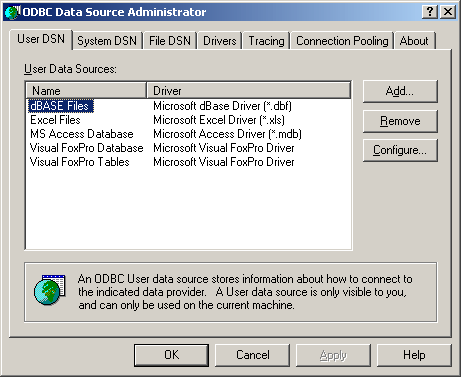
4) Change to the 'System DSN' tab (this is important, as STEARsoft only has access to the System area).
5) Then press the 'Add...' button to add your database.

6) You need to select the system your database is in (if your system is not listed, it is sometimes possible to install what is called an 'ODBC driver' which you will need to obtain from the provider of the database system you are using).
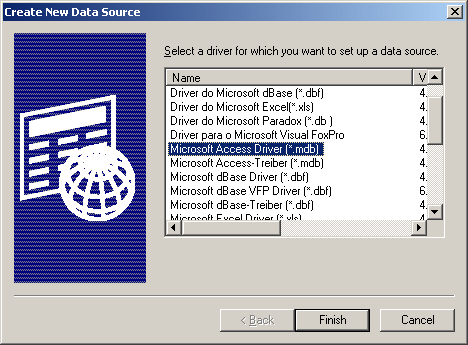
7) Click 'Finish' to get to the next screen.
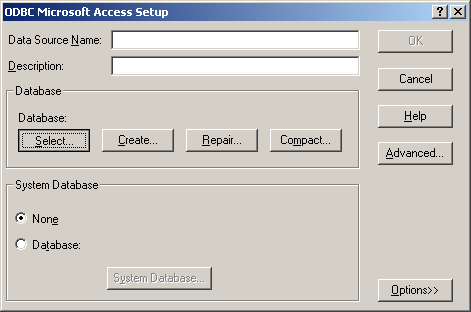
8) This screen may vary from system to system. For Access, press the 'Select...' button to locate your particular database file.
9) When you've located it, press 'OK'
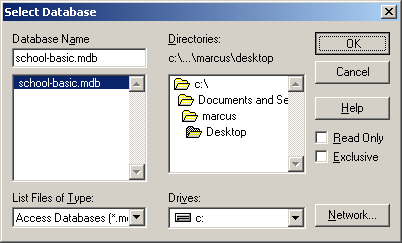
It now appears identified.
10) Fill in a name to identify your data source and an optional Description. At this point you can optionally set Advanced settings to do with username and password protection for accessing this data.
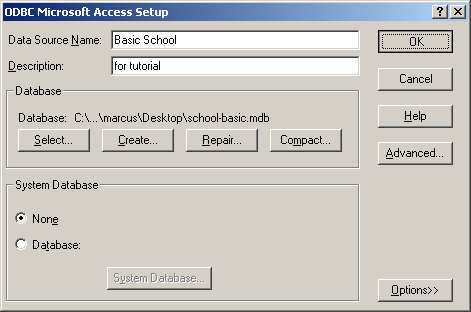
11) Press the 'OK' button to confirm and return to the Data Sources screen where you should now see your database listed.
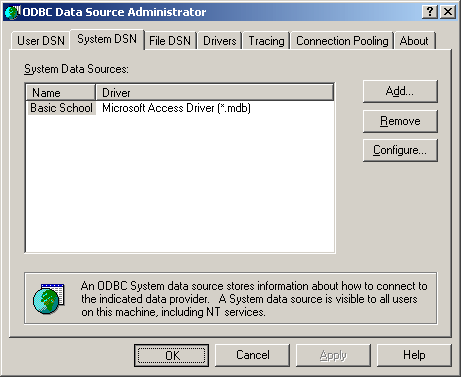
12) Click 'OK' here as well to complete the process.
You now have an ODBC data source which STEARsoft will be able to access, so start STEARsoft:
You only need to link up your ODBC data source once. Once set up, any changes to data in your main database can be imported on a single click. Here's how to set up the link:
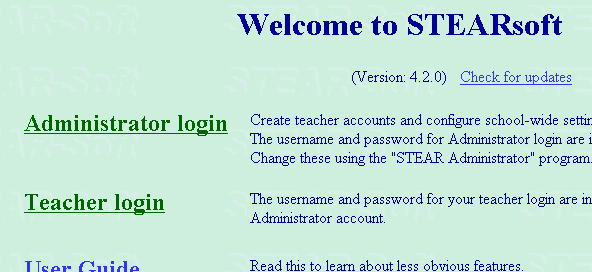
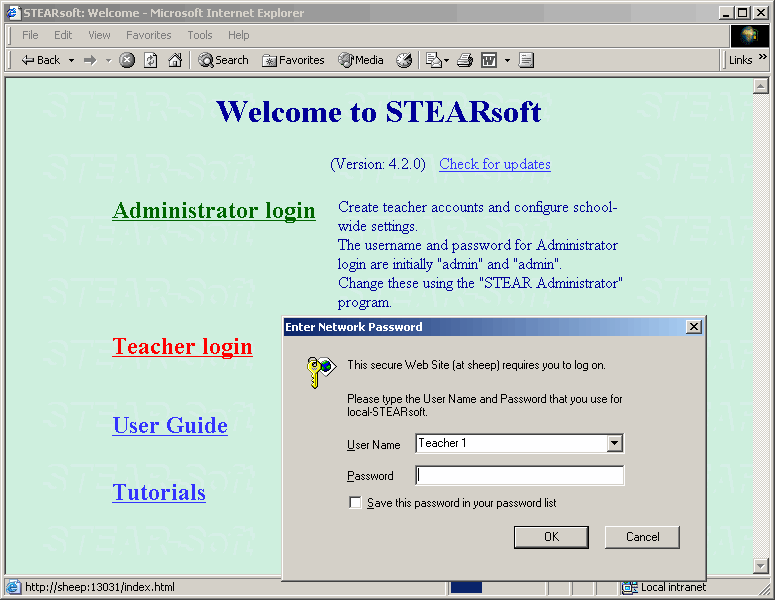
1) Go to the 'Administrator login'
2a) If you are running this for the first time, near the beginning of the setup Wizard you have the following option. In this case, select the 'Advanced user' option.
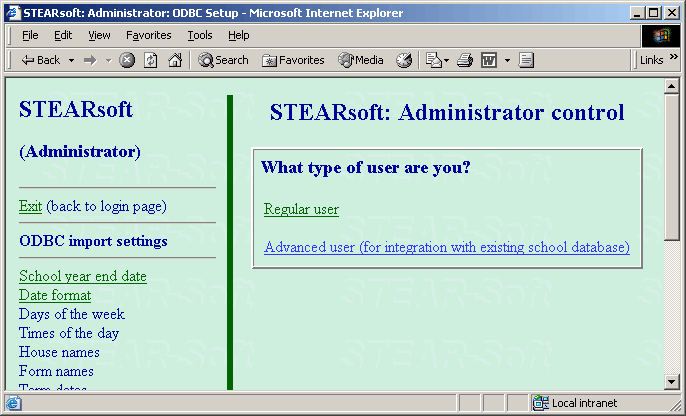
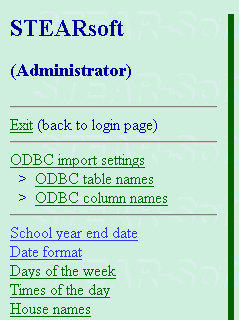
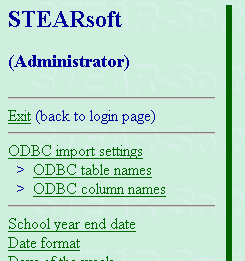
2b) If you have already run the setup wizard, you can get to these options by clicking on 'ODBC import settings' on the left panel.
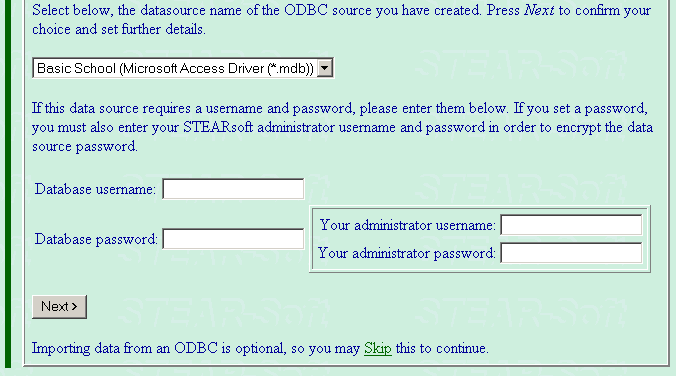
3) Either way you get a screen with the following options below some instructions. Select your database in the dropdown list. You only need to type the STEARsoft administrator username and password if you need to add or change a Database password.
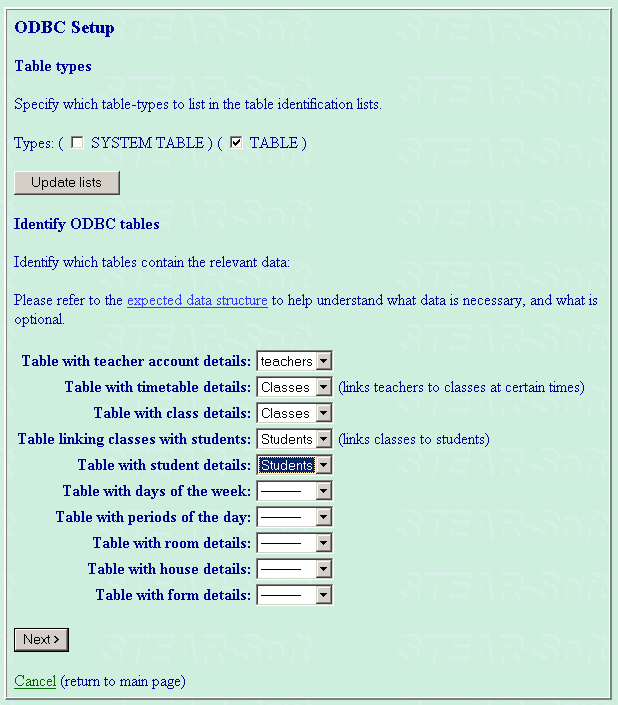
4) Click the 'Next>' button to get to the next screen. On this screen, you can simplify the lists you get by un-ticking the SYSTEM TABLE type and click 'Update lists'.
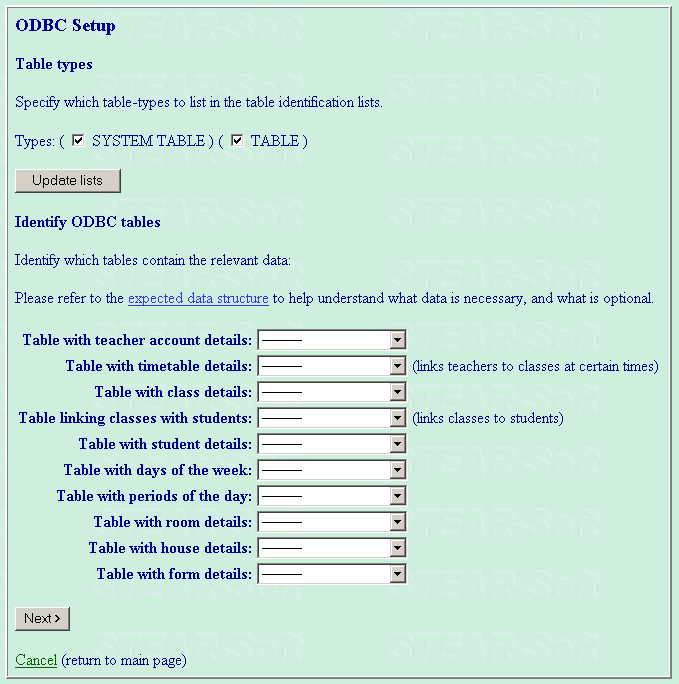
5) Select the tables from your database to fit the descriptions. The teacher, class and student details ones are obvious. The timetable details simply match teachers to classes at particular times. We aren't worried about times for this simple example and could use either the teachers or classes table, as both have a list of the class names which double up as the teacher identifiers and class identifiers. We need to use the Students table for the other linking details, as the student table pairs students with their classes.
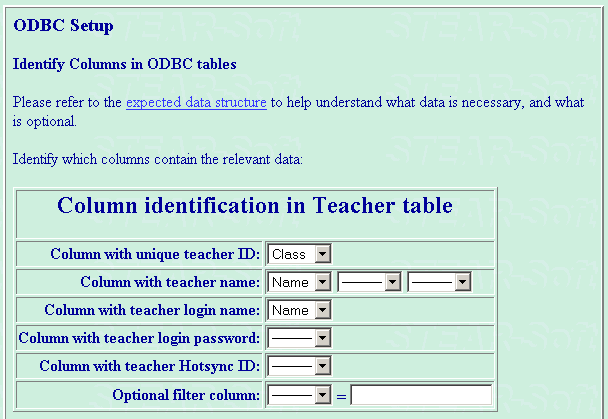
Clicking 'Next>' takes us to the final screen where we specify the details within each table. The 'expected data structure' link at the top gives a useful diagram showing how all the tables should link together and what information is required, and what is optional. The teacher table must at a minimum associate a 'login name' to a teacher ID. Notice that a table (such as the Name table) can be used in more than one place. In this case, their name is also their login name.
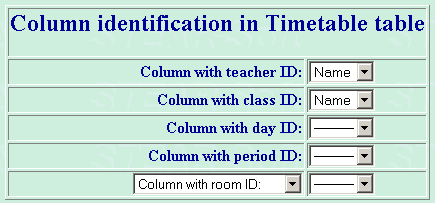
The class name is the ID of a class and the linked teacher, so is repeated in this simple example in the Timetable table:
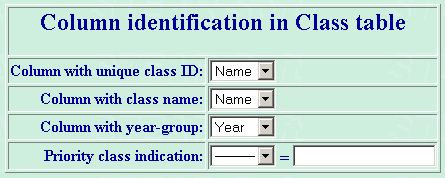
The Class table uses the class name as the unique ID as well as the visible name:
This Class-to-Student link is based on the student table, so is as shown:

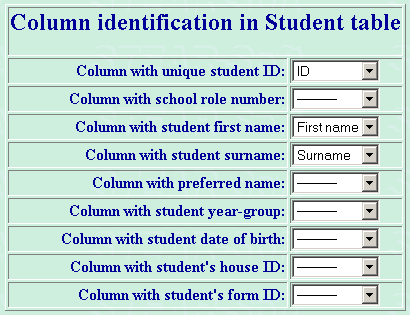
And student details are fairly obvious. school role number is optional, so I've left it blank here, but in most situations using this activates several useful advanced features in STEARsoft. It must refer to a unique student NUMBER.
When you've completed that screen, you have the rest of the setup wizard to get through, described in other tutorials.
Towards the end of the prompted setup screens, you will get to the following screen where you should click on 'ODBC: Import teacher accounts'
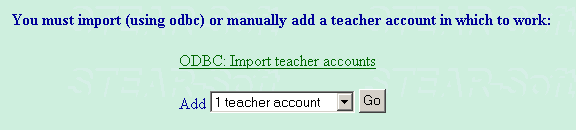
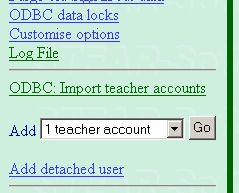
If you miss this, or have already created some teacher accounts manually, you can access this on the left panel, as shown below. Also click on 'ODBC: Import teacher accounts'. (you can do this at any point in the future to import new teacher accounts, or change existing details when they're available in your database.
Either way, you will get to the following screen which lists all the teachers in your database available for importing: (any teachers that you have already imported that haven't had their details changed will not be listed).
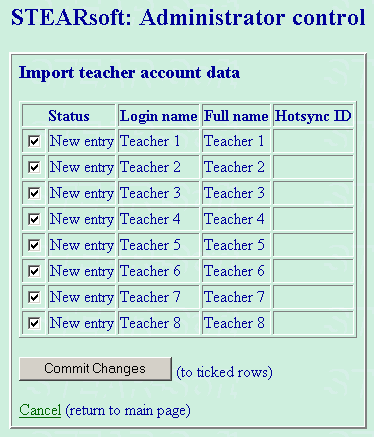
Make sure the teachers you want to import are ticked and press the 'Commit Changes' button.
That completes the administrator part, so back at the main screen, click the 'Exit' link:
Then teachers can log in with their login name as imported from your database:
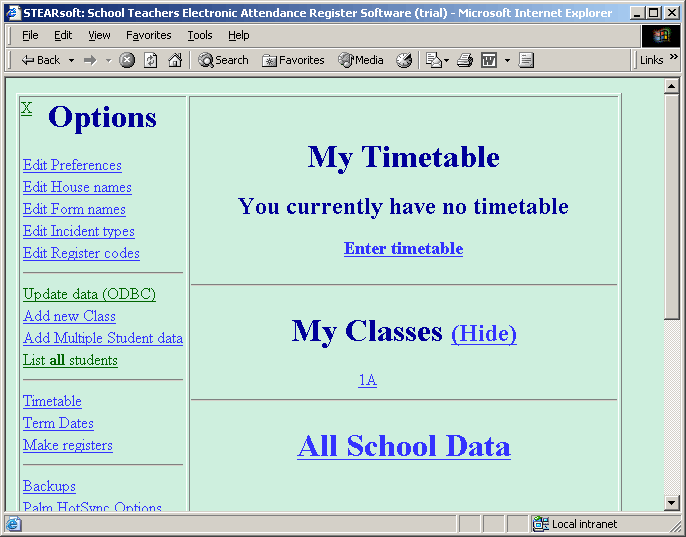
When they get to their screen, their classes from your database will automatically be imported (listed under 'My Classes'). Changes to your database here-after won't AUTOMATICALLY import here. teachers need to click the 'Update data (ODBC)' link in the options panel on the left to scan and import any changes or new data from your database.
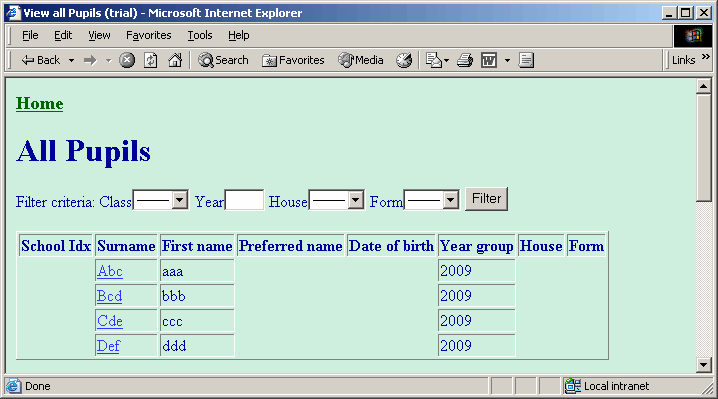
The import process also imports all their students, allocating them to classes. Clicking on 'List all students' shows this screen:
That concludes this basic example. In many ways this basic example is more complex than a fuller example because it uses some table entries for double uses (eg. class name is also used as class ID and teacher ID).
Back to the tutorials page